The Complete Property Inspection Guide for UK Landlords and Agents
Published 28 April 2026 · 12 min read
What Is a Property Inspection and Why It Matters
A property inspection is a systematic, documented assessment of a rental property's condition at a specific point in time. It records the state of every room, fixture, fitting, and inventory item, ideally supported by timestamped photographic evidence.
Property inspections serve three purposes:
Legal protection
In England and Wales, the Housing Act 2004 and the Homes (Fitness for Human Habitation) Act 2018 place obligations on landlords to maintain properties to a minimum standard. Regular documented inspections demonstrate compliance. For assured shorthold tenancies (ASTs), a detailed inventory and schedule of condition created at check-in is essential for any deposit dispute submitted to the Tenancy Deposit Scheme (TDS), Deposit Protection Service (DPS), or mydeposits adjudicators. Without one, adjudicators will almost always find in favour of the tenant.
For short-term rentals, platforms like Airbnb require photographic evidence submitted within specific timeframes to process damage claims through AirCover. A thorough inspection at each turnover is your insurance policy.
Financial protection
The average protected deposit in England is around £1,175, meaning a single unresolved dispute can wipe out many months of rental profit (TDS Statistical Briefing, 2024–25). Landlords lose a disproportionate share of disputes because their evidence falls short of adjudicator standards. A professional-quality inspection report with comprehensive photography turns the odds firmly in your favour. The cost of a proper inspection, whether conducted in-house or by an independent clerk, pays for itself many times over when a single dispute is resolved in your favour.
Operational efficiency
Regular inspections catch maintenance issues early, before minor problems become expensive repairs. A small damp patch behind a sofa, spotted during a mid-tenancy check, might cost £200 to remediate. Left undetected for twelve months, it could require replastering an entire wall, new flooring, and mould treatment costing £3,000 or more.
Types of Property Inspections
Not all inspections serve the same purpose. Understanding the different types ensures you apply the right level of detail at the right time.
Check-in / inventory inspection
Conducted immediately before a new tenant or guest takes occupancy. This is the baseline record that establishes the condition against which all future changes will be measured. A check-in inspection should document:
- Condition of every surface (walls, ceilings, floors, windows)
- State of all fixtures and fittings (kitchen appliances, bathroom sanitaryware, light fittings)
- Complete inventory of furnishings and their condition
- Meter readings (gas, electric, water)
- Key and fob quantities
- Garden and exterior condition
For residential lettings, this document forms the primary evidence in any future deposit dispute. For short-term lets, it establishes your evidence baseline for damage claims.
Mid-tenancy inspection
Conducted during a tenancy (typically every 3–6 months for ASTs) to check the property is being maintained appropriately and identify any emerging maintenance issues. Mid-tenancy inspections are less granular than check-in reports but should still be documented with photographs. They focus on:
- General cleanliness and housekeeping
- Unauthorised alterations or damage
- Signs of damp, mould, or condensation
- Smoke and carbon monoxide detector function
- Garden maintenance (if tenant-responsible)
- Overcrowding or subletting indicators
Check-out inspection
Conducted when a tenant vacates, comparing the property's current condition against the check-in baseline. This is the inspection that directly determines deposit deductions. It must be conducted as close to the move-out date as possible, ideally on the same day, and should use the identical room-by-room structure as the check-in report to enable like-for-like comparison. See our complete checkout inspection checklist for a detailed walkthrough.
Turnover inspection (short-term rentals)
For Airbnb hosts, serviced accommodation operators, and holiday let managers, every guest departure is effectively a mini check-out followed immediately by a check-in for the next guest. The window is often extremely tight, sometimes just a few hours. A turnover inspection must be quick but thorough enough to catch damage before the next guest arrives and the evidence trail is lost.
Periodic maintenance inspection
Separate from tenancy-related inspections, these focus specifically on the building fabric, systems, and statutory compliance items. They cover gas safety certificate validity, electrical installation condition report (EICR) expiry, legionella risk, fire safety measures, and structural condition. These should be scheduled independently of tenancy timelines.
When and How Often to Inspect
Inspection frequency depends on your property type, jurisdiction, and tenancy arrangement.
England
There is no statutory minimum inspection frequency for private landlords in England, but industry best practice (endorsed by ARLA Propertymark and the NRLA) is:
- Check-in: Day of tenancy commencement
- First mid-tenancy: 3 months after move-in
- Subsequent mid-tenancy: Every 6 months
- Check-out: Day of tenancy end
Landlords must give at least 24 hours' written notice before a mid-tenancy inspection (the Landlord and Tenant Act 1985 and the Housing Act 1988). In practice, 48 hours is advisable, and inspections should be arranged at a mutually convenient time. You cannot force entry unless there is an emergency.
Scotland
Under the Private Housing (Tenancies) (Scotland) Act 2016, private residential tenancies (PRTs) have no fixed end date, making regular inspections even more important for long-term property care. The same 24-hour notice requirement applies (or 48 hours under most model tenancy agreements). Scottish landlords must also comply with the Repairing Standard, which sets a higher maintenance bar than English legislation.
Wales
The Renting Homes (Wales) Act 2016 (fully commenced December 2022) introduced occupation contracts replacing ASTs. Landlords must give at least 24 hours' notice for inspections. The Act places additional obligations around fitness for human habitation from the outset of the contract, making a thorough check-in inspection even more critical as a compliance record.
Short-term rentals
For holiday lets and serviced accommodation, inspect at every turnover. There is no notice period requirement since the property should be vacant between guests. If you use a cleaning team, they should be trained to flag damage during their clean, but this is not a substitute for a structured inspection.
What to Include in a Property Inspection Report
A professional inspection report should be structured, consistent, and objective. Adjudicators, insurance assessors, and platform dispute teams all expect specific elements.
Room-by-room structure
Document every room individually, using a consistent structure. For each room, record:
- Ceiling: Condition, colour, any cracks, staining, or artex
- Walls: Condition per wall, marks, scuffs, holes, wallpaper condition
- Flooring: Type, condition, stains, wear pattern
- Windows: Frame condition, glass condition, lock function, blind/curtain state
- Doors: Condition, handle function, lock function
- Fixtures and fittings: Light fittings, switches, sockets (all tested)
- Furniture: Each item individually listed with condition
Condition vs cleanliness
Always separate condition (damage, wear) from cleanliness. These are distinct categories with different implications:
- Condition describes physical state: scratches, chips, dents, stains that cannot be cleaned, broken mechanisms
- Cleanliness describes how clean the item or surface is: dusty, greasy, limescale build-up, cobwebs
This distinction matters because fair wear and tear applies to condition (you generally cannot deduct for normal ageing) but a tenant can be held responsible for inadequate cleaning at check-out if the property was professionally cleaned at check-in.
Inventory detail
For furnished and part-furnished properties, every moveable item must be individually listed. Include:
- Item description (e.g., "John Lewis oak-effect coffee table, 120cm x 60cm")
- Quantity
- Condition (use a consistent scale: New, Good, Fair, Poor, Damaged)
- Specific defects noted
Meter readings and keys
Record all utility meter readings with photographs of the meter display. Document the number and type of keys provided (front door, back door, window keys, garage fobs, communal entry fobs). This prevents disputes about unreturned keys, which can otherwise result in lock-change deductions.
Objective language
Use factual, descriptive language. Avoid subjective terms like "acceptable" or "quite good". Instead, describe exactly what you see: "Three scuff marks on skirting board, east wall, each approximately 5cm in length" is far more useful than "some marks on skirting".
Photographic Evidence Standards
Photographs are the backbone of any inspection report. Poor-quality images can render an otherwise thorough inspection worthless in a dispute.
Lighting
Always use natural light where possible. Open curtains and blinds fully before photographing. If natural light is insufficient (bathrooms, utility cupboards), use your device's flash but take a second shot without flash to avoid glare masking details. Avoid photographing directly into windows, as this creates silhouettes and washes out room detail.
Angles and coverage
For each room, capture:
- Overview shots: One from each corner showing two walls, giving full 360-degree coverage in four images
- Ceiling shot: Standing in the centre of the room, pointing directly up
- Floor shot: Capture the full floor from the doorway
- Detail shots: Close-ups of any damage, wear, or notable features (within 30cm)
- Fixtures: Individual photos of each appliance, fitting, and piece of furniture
Timestamps and metadata
Ensure your device's date and time are accurate. EXIF data embedded in photographs provides an immutable timestamp that adjudicators trust. If using a dedicated inspection app, GPS coordinates add further weight to your evidence by proving where the photo was taken. Never alter or filter inspection photographs, as this can undermine their credibility as evidence.
Quantity
There is no such thing as too many inspection photographs. A typical two-bedroom flat should generate 80–150 images at check-in. A four-bedroom house might require 200–300. Storage is cheap; lost disputes are expensive. Professional inventory clerks typically capture well over 100 photos for even a one-bedroom flat, prioritising completeness over speed.
Video walkthroughs
Video walkthroughs are increasingly used alongside still photography. A slow, narrated walk through the property provides continuous context that individual photos cannot. Video is particularly useful for demonstrating that items are present and working (running taps, operating appliances, opening windows). However, video should supplement still photography rather than replace it; still photographs remain easier to reference in reports and disputes.
Digital Tools vs Paper Inspections
The property industry has been slow to abandon paper and clipboard inspections, but the shift to digital is now well underway, and for good reason.
The paper problem
Traditional paper inspections suffer from multiple weaknesses:
- Inconsistency: Different clerks use different terminology, formats, and levels of detail
- Handwriting: Illegible notes are worthless in a dispute
- Photo matching: Manually matching printed photos to handwritten notes is error-prone
- Storage: Physical documents get lost, damaged, or misfiled over multi-year tenancies
- Comparison: Comparing check-in vs check-out requires placing two paper reports side by side, which is time-consuming and easy to miss discrepancies
- Sharing: Sending copies to tenants, adjudicators, or insurers requires scanning or photocopying
The digital advantage
Modern digital inspection tools solve all of these problems:
- Structured templates: Every inspector follows the same format, ensuring nothing is missed
- Inline photography: Photos are automatically linked to the correct room and item
- Timestamps: Automatic, tamper-evident date and time stamps on every entry
- Cloud storage: Reports are securely stored and instantly retrievable years later
- Comparison tools: Side-by-side check-in vs check-out comparison at the click of a button
- Instant sharing: PDF reports generated and emailed to all parties within minutes of completion
- Audit trail: Full history of when reports were created, viewed, and signed
The cost of digital inspection tools varies widely depending on portfolio size, but it is a fraction of what a single lost deposit dispute costs. If you are still using paper, the business case for switching is overwhelming.
Common Inspection Mistakes That Cost Landlords Money
Certain patterns emerge consistently in deposit dispute outcomes. These are the mistakes that result in landlords losing claims they should have won.
1. No check-in report at all
Astonishingly common, particularly among landlords who self-manage. Without a documented baseline, you have no evidence of the property's prior condition. Adjudicators will not accept "it was in perfect condition when they moved in" without documentary proof. You will lose virtually every claim.
2. Photographs without context
A close-up of a stain is useless if the adjudicator cannot determine which room, which wall, or which item it relates to. Always include wide-angle context shots before zooming in to damage detail.
3. Failing to record pre-existing damage
If minor marks, scuffs, or wear exist at check-in and you do not document them, you cannot later claim they were caused by the tenant. Be meticulous about recording even trivial blemishes; doing so establishes that you document everything, lending credibility to items you flag at check-out.
4. Waiting too long for check-out
Conducting the check-out inspection days or weeks after the tenant has left opens you to the argument that damage occurred after their departure. Inspect on the day of key return, or as close to it as physically possible.
5. Ignoring fair wear and tear
Adjudicators will dismiss claims for damage that constitutes reasonable wear and tear given the tenancy length. Carpets fade. Paint dulls. Small scuffs appear on skirting boards. Attempting to claim for these undermines your credibility on legitimate damage claims within the same dispute. Focus your claim on genuine damage beyond normal wear.
6. Single-photo evidence
One photograph of a damaged item is rarely sufficient. Capture multiple angles and distances. Show the item in context (wide shot) and in detail (close-up). For stains, include a reference object for scale (a coin works well).
7. Not having the tenant sign
If a tenant signs the check-in report agreeing to its accuracy, it becomes extremely difficult for them to later dispute its contents. Always present the report for signature (digital or physical) and retain proof of their agreement. If they refuse to sign, record that refusal in writing and send the report by email, noting the date it was provided.
How AI Is Streamlining the Inspection Process
AI is beginning to transform property inspections in ways that benefit landlords, agents, and tenants alike. Practical applications are already in use.
Automated damage detection
AI-powered image analysis can automatically identify and categorise damage in inspection photographs. Rather than relying solely on a human inspector to spot every scuff mark, scratch, or stain in hundreds of images, computer vision algorithms flag potential issues for human review. This reduces the chance of missed damage and speeds up the reporting process.
Condition comparison
AI excels at comparing two sets of images and highlighting differences. When applied to check-in vs check-out photographs of the same room, AI can identify changes that a human eye might miss, including subtle differences in wall condition, carpet wear patterns, or appliance state. This makes the checkout comparison process significantly more reliable.
Automated report generation
Rather than spending 45–90 minutes writing up an inspection report after completing the physical walkthrough, AI can generate structured, professional reports from captured photographs and brief notes. The inspector's role shifts from documentation to verification: reviewing and approving AI-generated descriptions rather than writing everything from scratch.
Inventory recognition
Computer vision can automatically identify and catalogue furniture, appliances, and fittings from photographs, creating or verifying inventory lists without manual item-by-item entry. This is particularly valuable for furnished properties and short-term rentals where inventory accuracy is critical for damage claims.
Evidence standards compliance
AI can assess whether inspection photographs meet the evidence standards required by adjudicators, checking for adequate lighting, appropriate angles, sufficient coverage, and proper metadata. Photos that fall short are flagged immediately during the inspection, giving the inspector the opportunity to retake them on-site rather than discovering gaps days later.
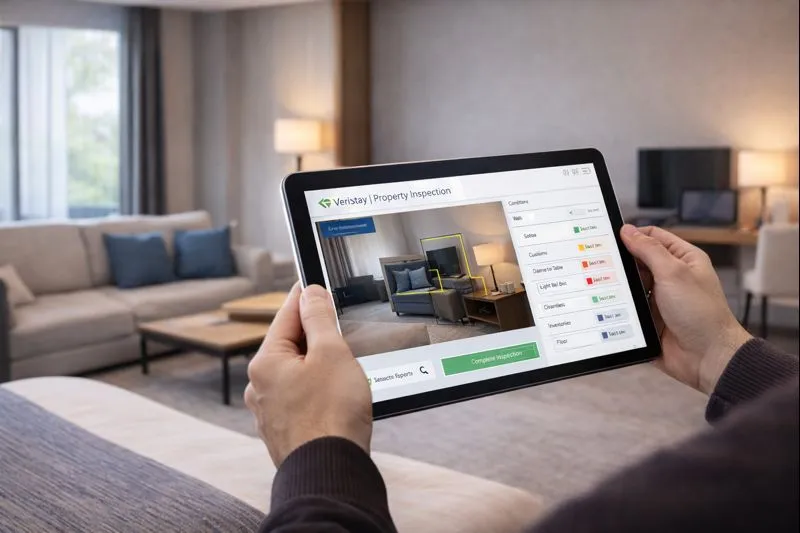
Platforms like VeriStay are bringing these capabilities together into integrated inspection workflows, combining AI-powered damage detection with structured room-by-room templates and instant report generation. The result is inspections that are faster to conduct, more thorough in coverage, and produce evidence that meets the highest professional standards. Learn more about how AI is reshaping property inspections across the industry.
Quick-Reference Checklist
Use this checklist as a reminder of the essentials before every inspection:
- Before arrival: Charge device, clear storage space, review previous report (if mid-tenancy or check-out), confirm tenant notification
- Exterior: Front approach, garden, gutters, windows from outside, signage, bins
- Hallway: Front door condition, locks, letterbox, flooring, walls, ceiling, light fittings
- Each room: Four corner overview shots, ceiling, floor, all fixtures, all furniture, windows, doors, sockets, switches
- Kitchen: All appliances (open doors, photograph interiors), worktops, splashback, sink, taps, cupboard interiors, extraction
- Bathroom(s): Sanitaryware, seals, grouting, extractor, shower screen/curtain, tiling, mirror
- Meters: Photograph all utility meter readings
- Safety: Test smoke alarms, CO detectors, check fire blanket, note gas safety certificate date
- Keys: Count and document all keys, fobs, and codes provided
- Sign-off: Have tenant review and sign the report (or record refusal)
Related Guides
This article is part of our comprehensive property inspection resource library. Explore the related guides below for detailed coverage of specific topics:
- The Complete Checkout Inspection Checklist: A step-by-step walkthrough for conducting check-out inspections that stand up to adjudicator scrutiny
- Airbnb Damage Claim Evidence Guide: How to document and submit damage evidence that meets AirCover requirements and maximises your claim success rate
- Tenancy Deposit Disputes: What Adjudicators Actually Want to See: Evidence standards, common adjudicator decisions, and how to present your case effectively
- The Airbnb Turnover Checklist: A rapid inspection and preparation workflow for short-term rental operators managing tight changeover windows
- AI-Powered Property Inspections: The Future Is Here: How AI is transforming damage detection, report generation, and evidence compliance in property inspections
This guide is provided for informational purposes and reflects UK legislation as of April 2026. It does not constitute legal advice. For specific legal questions regarding your obligations as a landlord, consult a qualified solicitor or your local authority's housing team.
Ready to modernise your inspections?
VeriStay uses AI to automate damage detection, generate reports, and build evidence packs that stand up to any dispute.
Get Early Access